Autoweek Reviews the Drakan Spyder


Autoweek has reviewed the Drakan Spyder this week writing up a fairly positive article.  While they don't get their facts quite right (for example: "the TIG-welded chromoly tube chassis is likewise about as solid as Drakan could make it."...what?) which seems pretty standard for journalists, its still great to see people generally responding well to the chassis and handling characteristics of the car.  

Its also nice to see a revision of the article that gives credit to Palatov for the design of the car where as the initial release of the article gave credit for the design and manufacture to Shinoo at Sector 111.  Still don't know who this Drakan company is they talk about though.   

http://autoweek.com/article/drive-reviews/drakan-spyder-first-drive

New Product Available

I recently got permission from Dennis at Palatov Motorsports to 3D print and sell vortex generators that Dennis has been using for many years.  At Palatov Motorsports they have been used to improve the performance of the aerodynamic floor on the D1 and D4 but they can be used in an endless number of other applications to improve flow characteristics.  

While Palatov use beautiful looking aluminum versions of these exact parts, 3D printed versions work just as well.  There are also some distinct advantage of a 3D printed vortex generator such as reduced cost and the ability to mold them to any surface curvature with careful application of heat from a heat gun.  

The standard size is approximately 1 inch by 1 inch and will sell for .50 cents each but I can scale them to just about any size.  For larger sizes please contact me.  

Curing the Red Ring of Death

Its been a while since I've had an electronics project and for once my electronics work bench is nice and clean!  I was given this first generation Xbox 360 by a family member who was moving and getting rid of old things. This xbox apparently suffers from the "red ring of death" which didnt mean a whole lot to me but sounded pretty bad.  I did a bit of research and found there are multiple errors that can happen but typically the red ring of death error is indicated by three red LED's lighting up around the power button.  I haven't tried to power it up (which I probably should come to think of it) to see what happens.  I got a little carried away just trying to open the thing up to see whats inside.  Unfortunately I was stopped by Torx screws, ones smaller than the Torx bits I have on hand.  Looks like its time I add some small Torx drivers to my tool box. 


From what I learned the red ring of death error is caused by the processors not being able to dissipate enough heat.  I think I've got some heatsinks laying around.  Its also suggested that attempting to reflow the board can help too so I might get some practice reflowing chips with my "SMD Rework Station".  Could be fun!

Miata Dipstick Top Invintory Gets a Big Boost

Everyone at Palatov is away on personal trips at the end of this week and while strongly encouraged to enjoy some days off as well, I instead have just been taking time to work on my own projects.  Yesterday my website got a bit of a make over and I added new pictures of one of the latest Sector 111 car to leave the shop.  Today I spent the whole day machining.  9 feet of aluminum bar became 48 Miata dipstick tops ready to be polished.  That just might be enough inventory to last well into next year.  

Some up and coming changes

When I first started building this website it seemed pretty easy to classify each different project as something involving design or 3D printing or electronics.  As time has progressed however, I’m finding myself using all of these skills for one project. 

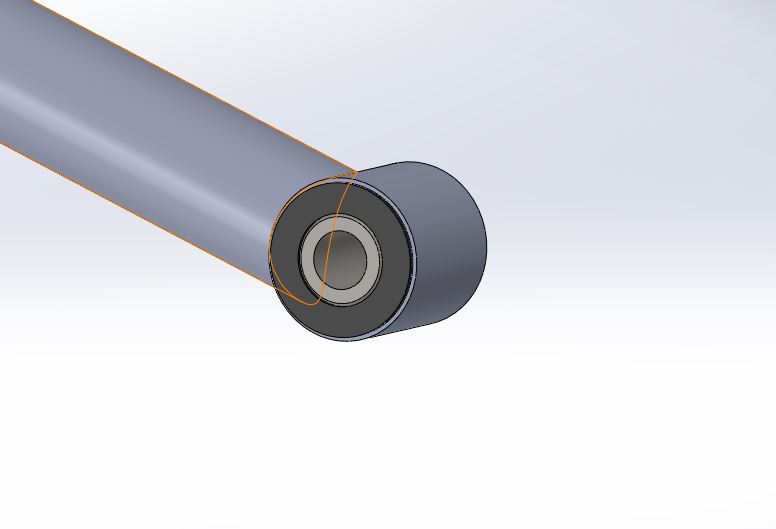
For example I might start with a design project that then of course is modeled in cad.  When I have a working cad model and want to check that everything works in reality and makes sense I will then run a 3D print and test fit the part.  After assessing how things look and fit I will either go back to make some changes in cad and either print a new part or pass on the finalized design to be machined and installed or sold. An example of this is shown below with the A3 Control Arms.  I was originally given this project but the need to get cars out the door at Palatov made it a very low priority.  Then eventually another company was given the project in exchange for Pikes Peak 2015 sponsor representation and now that the arms are completed its come back to me to sort out the detail pieces such as bushings and hardware kits.  

Moving on I will be trying to reorganize the pages on my website to reflect this combining of skills and abilities focusing more on what the project is rather than what skills are involved in completing that project.  This is going to take some trial and error but I think as time goes on my Blog will become a catchall for small projects and eventually those will work their way into detailed pages.  

How hard could it be?

After many years we finally got a set of Ariel Atom A3 control arms which is great except for now we have to sort out the additional parts needed such as suspension bushings to get them to work.  This is particularly challenging in that we no longer have any examples to measure and crosscheck parts.  On the plus side its been a great chance to go through parts I designed years ago and just make extra sure they will work with the new control arms.  As is typical with projects that I start I probably got told "never mind we need to move onto more important things" while in the middle of designing things so there was some tweaking needed but I'm confidant my parts will work.  Still as a reality check I'll be 3D printing examples over night to check in the morning because I can :-)  

Another fun project I've had going on is actually completing (for the most part) the cooling system on the Denk Hot Rod Project at Palatov.  I ran into a problem with the thermostat hose and the belt but found a one inch spacer would solve all of my problems.  To help prevent leaks I designed in an O-ring grove.  The great guys down at McGuiar Bearing gave me a couple O-rings when I stopped by so I could check that I got my dimensions correct.  While they didn't have the exact size o-ring, the next size down fit and gave me a good indication of how much 'squeeze' the proper size o-ring would have.  


Fender Elminator Page Added

I took some time out today to put together a page for my Ninja 300 Fender Eliminator project I've been working on the past month.  Its probably one of the first pages that walks through a project from initial idea to completed product and I talk about all the elements, thinking processes and challenges that helped shape and direct the design.  

I'm still pleased with the my fender eliminator and its seen about 5,000 miles without any problems!  Not too bad for something I designed and manufactured in my free time.

I will probably add a second page for the transistor relay that I have been working on building as well.  Unfortunately the relay has yet to live up to its design requirements but I've been learning a lot about electronics and have been getting to spend some quality time with my multi-meter, oscilloscope and bread board so I cant complain.  

Click here to go to the fender eliminator page.

New Product Available!

Im happy I have a chance to at least add a blog post to the site.  I've been so busy!  Im currently building three Sector 111 Drakan cars simultaniously and have been working on developing a fender eliminator kit for my Kawasaki Ninja 300.


I am pleased to announce that I have my first few production brackets ready for sale and listed on eBay.  Now I just have to wait and see if people actually buy them.  Ive gone through so many iterations over the past couple weeks its kind of crazy!  I'll be adding a section specifically for the development of the bracket in the future.  It has been a great learning experience and continues to be a great learning experience as I am still working on developing a turn signal relay to sell with the bracket.  

Computer Aided Design Major Update

I spent much of today adding content to my CAD section.  Each project now has a click through link that provides better pictures and more detailed information.  This is something I hope to implement for my other pages in the future.  Its kind of neat as there is often crossover between sections so some of the cad pages have information showing everything from my thoughts in the design process to the finished finished part with pictures.  Its been kind of neat seeing some of the projects I've completed in the past as well.  Its always a great feeling when you find yourself impressed with your own work.  

Still much to add as always, stay tuned!